1/6th Dragon Sherman – Hull Upgrade
Price range: $6.00 through $150.00
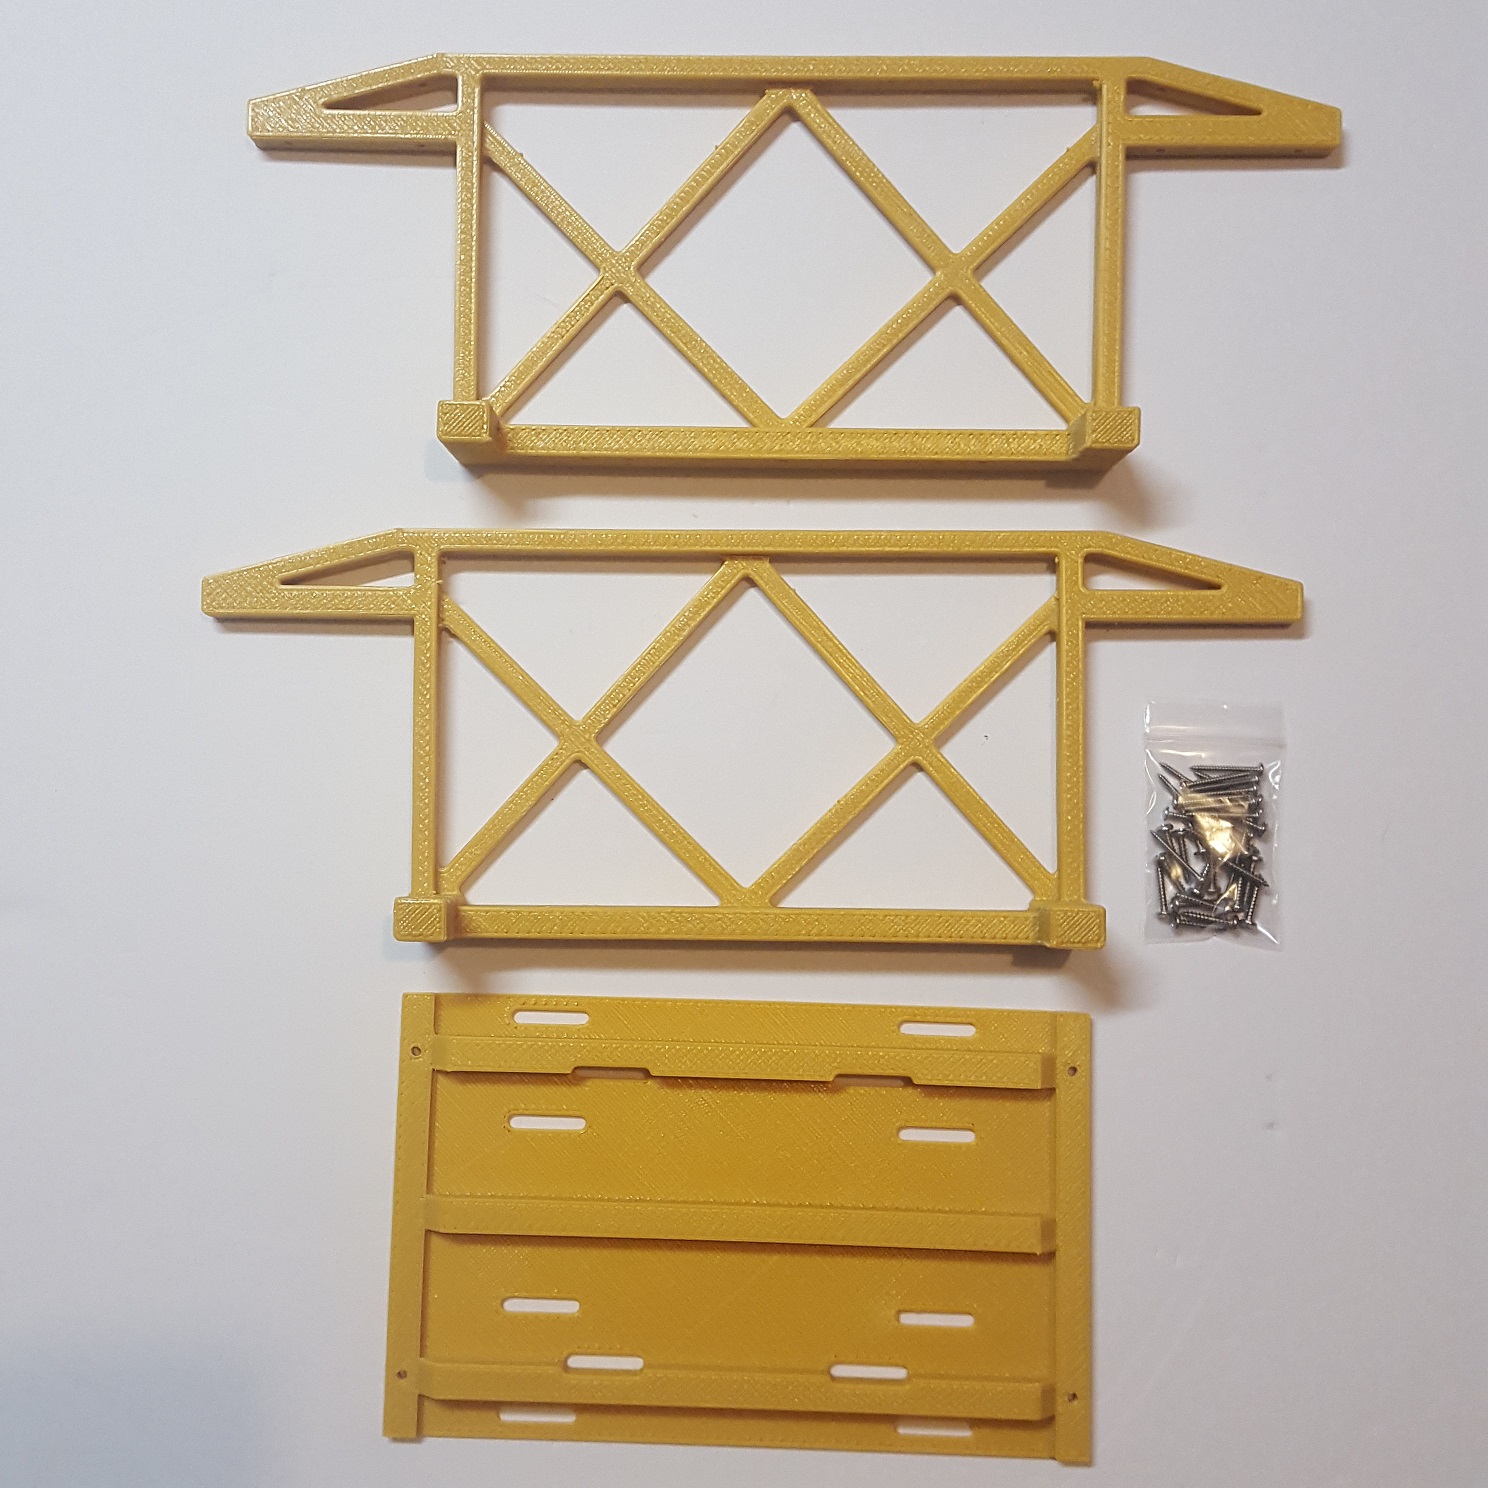
RC conversion parts for the 1/6th scale Dragon Sherman Check out the assembly video below:
***Colors will vary depending on what I have on hand
Description
FEATURES
- Super thick solid printed parts that add significant strength to the hull!
INCLUDES
- Printed parts
- Hardware
REQUIRES
- Assembly
Additional information
| Weight | 2 lbs |
|---|---|
| Dimensions | 20 × 10 × 4 in |
| Type | Full KIT, Hardware Only |
2 reviews for 1/6th Dragon Sherman – Hull Upgrade
Only logged in customers who have purchased this product may leave a review.


ThomasJW (verified owner) –
This is my second kit from Ryan. Ordered on Sunday and received it that Thursday!
Opening the package, I was surprised/pleased to see the parts printed in a snazzy red … your color may vary.
In addition to the two rear braces, battery tray, and hardware, I also got the front brace that’s
described in the transmission upgrade video! I don’t know if that’s how Ryan is shipping the kit now
or if it’s because I intend to buy the trans upgrade later so he kept it all the same color 😊.
The printed parts are extremely solid. The only minor flaw in the printing has to do with the ‘feet’.
I suspect this is the tallest area of the printed part and the relatively small surface area was kept
heated by the print nozzle and as a result the plastic ‘slumped’ a little. In any event they are slightly
deformed for whatever reason but since it’s hidden there’s no worries.
Once again following Ryan’s excellent instructional videos, the kit is straight forward and easy to install.
The one problem area I had was getting the four bogie holes to align with the 3/32″ holes drilled into the
‘feet’ of the braces. The printed braces seemed to be a bit short or slightly off, maybe due to the above
mentioned flaw, or possibly the slight warping in the hull, or a combination of both. One thought would be
instead of pre-drilling all of the 3/32″ holes, drill only one hole in each foot of the brace to anchor it
in place while you screw in the three bottom hull screws and two screws for each sponson. Then once that is
screwed down solid, drill in the remaining three holes per foot to get a perfect alignment.
The video kind of glosses over the battery tray but know that there are five holes in the bottom of the two rear
braces instead of three. The center and two outside holes are for the hull screws and the remaining two are
to install the tray. Installing the bottom hull screws, they do penetrate the brace and the tip protrudes
from the plastic. The battery tray conveniently covers these points but if you crank it down, the corners of
the tray will bend upward slightly due to the protruding screws. Drilling a small well in the underside of the
tray to receive the screw would fix this. I mounted it with the smooth side facing up.
When everything is installed and screwed down, the hull becomes incredibly rigid with hardly any flex at all.
I test fitted the upper hull and the mounting holes lined up perfectly! Overall, another great kit from Ryan.
Up next … the transmission.
RC_BobM (verified owner) –
Very good kit, another great upgrade for the Sherman. Relatively easy to install with all the hardware. Does really stiffen up the hull once installed. I like how the screws go through the bogey suspension into the hull brackets. The only minor quibble with this kit was some of the printing was a bit rough and some of the holes had to be re-drilled. Nothing an experienced builder could not handle. Highly recommended.